Getting Started with Your Todo List
Welcome! This guide will help you make the most of the Todo List application.
How It Works (Under the Hood)
This Todo application is built using modern web technologies, primarily SvelteKit (a framework for building web applications) and Tailwind CSS (for styling).
Important: All your task data (tasks, subtasks, comments, time entries) is stored only in your web browser using a technology called IndexedDB (managed via the Dexie.js library).
This means:
- Your data is private to you and the specific browser you are using.
- No data is sent to or stored on any external server.
- If you clear your browser's site data for this application, your tasks will be permanently deleted from that browser.
- Your tasks will not automatically sync between different browsers or devices. Use the Export/Import feature to move data manually.
Viewing Your Tasks (Main List)
The main screen (`/todo`) shows all your primary tasks. Here's what you can do:

- Find Tasks Quickly: Use the Search bar, or filter by Status or Priority using the dropdowns above the list.
- Change Sort Order: Use the Sort By controls to see tasks ordered by creation date, due date, priority, or title.
- Filter by Tag: Click on any tag (like
workorhome) shown on a task. The list will update to show only tasks with that tag. A blue banner will appear showing the active tag filter; click "Clear" on the banner to see all tasks again. - See Task Details: Click on a task's title to go to its details page.
- Quick Edit: Click the
Pencil Iconon a task to edit its details directly in the list. - Delete Task: Click the
Trash Iconto permanently remove a task (and any subtasks it contains). You'll be asked to confirm first. - View Subtasks: If a task has subtasks, they appear indented below it, showing their status and title (which links to the subtask's details page) and creation time.
- Import/Export: Use the Import and Export buttons (top right) to save your tasks to a file or load tasks from a file. Warning: Importing replaces all current tasks.
- Add a New Task: Click the "+ Add Task" button (top right).
2. Due Dates View (`/todo/due-dates`)
This view provides a calendar-like overview of your tasks based on their due dates.
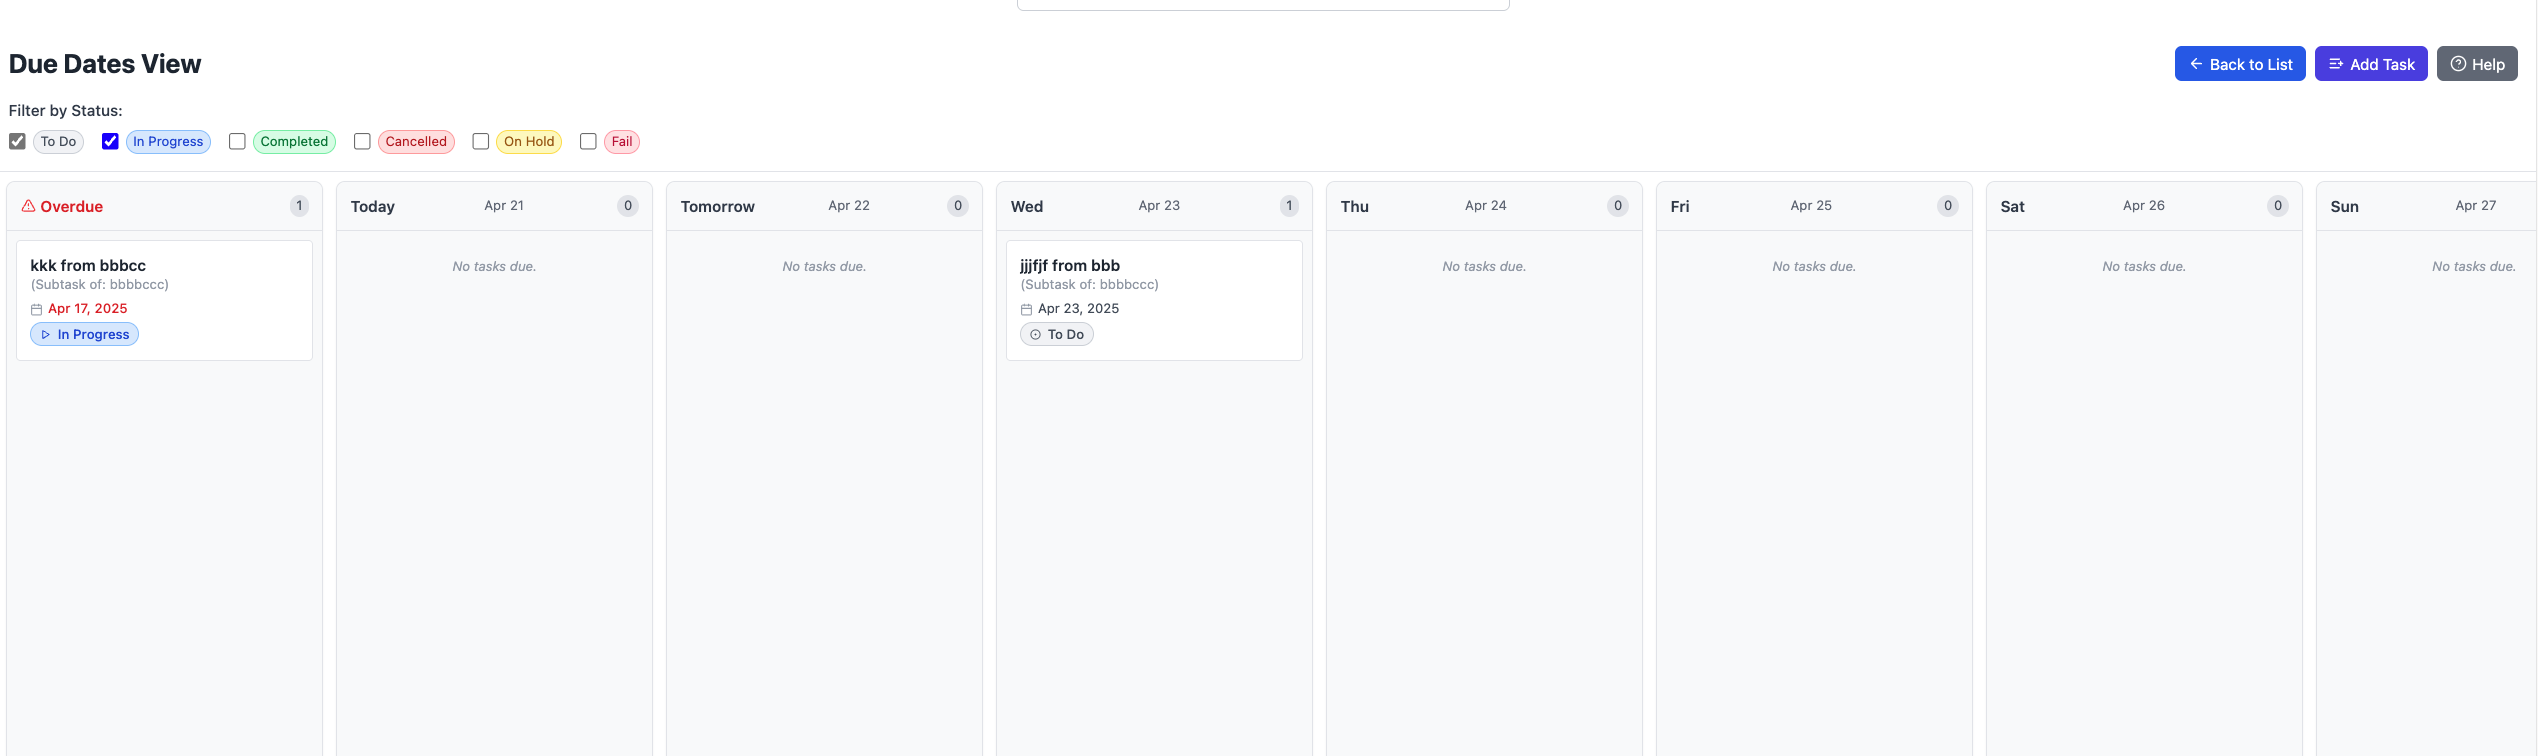
- Layout: Tasks are organized into columns: Overdue, Today, Tomorrow, the next 5 weekdays (e.g., Wed, Thu, Fri, Sat, Sun), Future, and No Due Date.
- Scrolling: On wider screens, you might need to scroll horizontally (left/right) at the bottom of the columns area to see all date columns. Each column scrolls vertically if it contains many tasks.
- Filtering: Use the checkboxes at the top to show tasks with specific statuses (defaults to showing 'To Do' and 'In Progress').
- Sorting: Within each column, tasks are automatically sorted first by Priority (Urgent at the top) and then by their Creation Time (oldest first).
- Task Cards: Each card displays the task/subtask Title (with parent context if it's a subtask), Due Date, Priority, Status, and any Tags.
- Navigation: Click on a task card's title to navigate to its full details page. Click on a tag to filter the main list view by that tag.
- Buttons: Use the buttons at the top right to navigate back to the main Todo List or to add a new task.
3. Track Time Analysis (`/todo/track-time`)
This page allows you to analyze the time logged against your tasks and subtasks.

- Purpose: View aggregated or individual time entries based on various filters.
- Filtering:
- Status: Check the boxes for the task statuses you want to include (defaults to To Do, In Progress, Completed).
- Date Range: Select a preset (This Week, Month, Year) or use the date inputs for a custom range. This filters the time entries based on *when they were logged* (`entryDate`), not the task's creation or due date.
- Task Type: Choose to view time entries for All items, Tasks Only, or Subtasks Only.
- Grouping & Sorting:
- Show Individual Time Entries: Uncheck this (default) to group entries by task/subtask and see the total duration. Check it to view each time log separately.
- Group by Top-Level Task: When individual entries are *not* shown, check this to group time by the main parent task instead of the immediate task/subtask the time was logged against. This checkbox is disabled if individual entries are shown.
- Order by Task/Subtask Name: When individual entries *are* shown, check this to sort the list alphabetically by task/subtask name first, then by date (newest first). If unchecked (default), the list sorts purely by date (newest first). This checkbox is disabled if individual entries are not shown.
- Summary Area: Displays the Total Time Logged and Average Time per Task/Subtask based on the current filters, along with the count of items in the list below.
- List Display: Shows either grouped summaries or individual time entries. Each item displays the task/subtask title (clickable link to details), parent task (if applicable), tags (clickable), status, duration logged, and the date/time of the entry (or the latest entry if grouped).
- Navigation: Use the buttons at the top right to go back to the main Todo List, add a new task, or view this help page.
4. Adding a New Task
Clicking "+ Add Task" takes you to the Add Task screen (`/todo/add`).
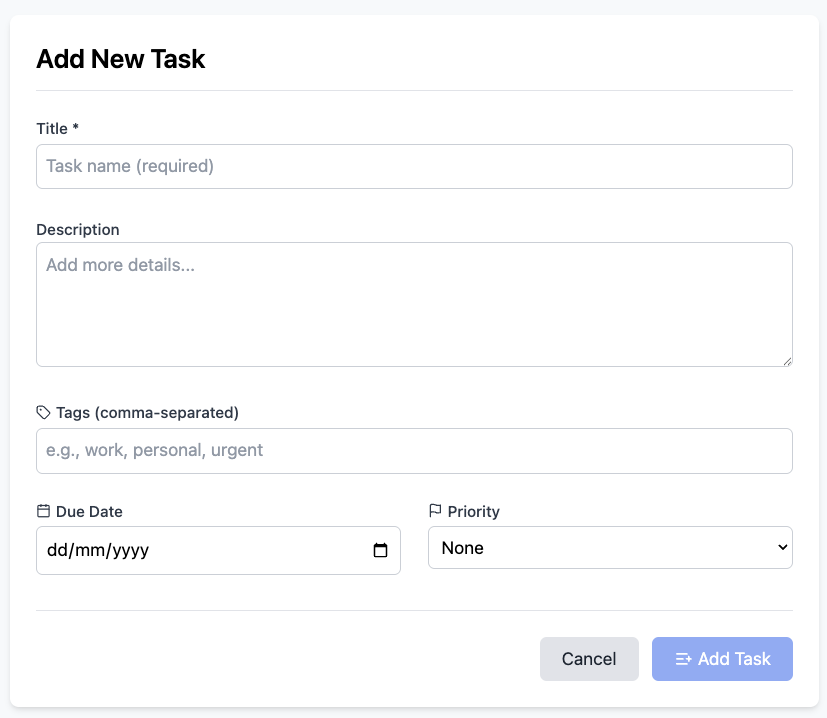
- Fill in the Title (required).
- Optionally add a Description, Tags (separated by commas), Due Date, Priority, or Recurrence.
- Click "Add Task" to save and return to the list, or "Cancel" to go back without saving.
5. Managing Task Details
Clicking a task title takes you to its details page (`/todo/details/...`).
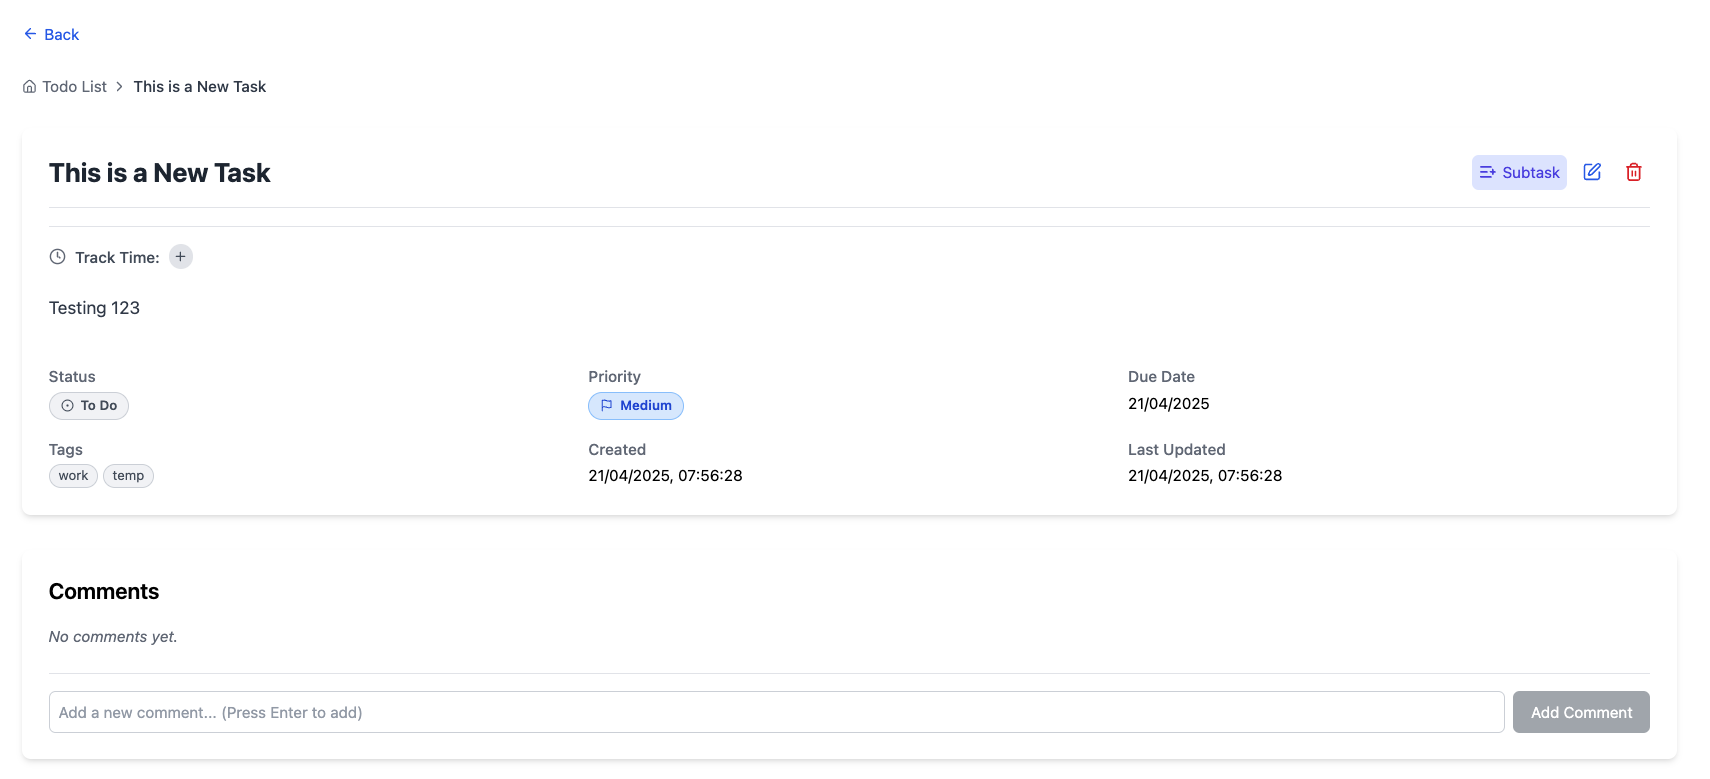
- Breadcrumbs: See the path to the current task (e.g., Todo List → Project A → Subtask 1). Direct subtasks of the current task are also listed as quick links below the breadcrumbs.
- View Info: See the full title, description, status, priority, dates, and tags.
- Track Time: Below the main header, you'll find the "Track Time:" section. It shows the total time logged for this task (e.g., 1h 30m). Click the + button to open a modal where you can enter time spent (use formats like "2h", "45m", "1h 15m", or just numbers for minutes).
- Quick Edits: Click directly on the Status, Priority, or Due Date text to change them instantly without entering full edit mode.
- Add Subtask: Click the "+ Subtask" button to go to the Add Subtask screen for this task.
- Edit Task: Click the
Pencil Iconto enter Edit Mode. - Delete Task: Click the
Trash Iconto delete the task and its subtasks (confirmation required). - Edit Mode: Modify title, description, status, priority, due date, or tags. Click Save Changes or Cancel.
- Subtasks List: See any subtasks associated with this task. Click their titles to view their details.
- Comments: View existing comments, add new ones using the input field, or edit/delete your comments using the buttons that appear on hover.
6. Adding a Subtask
Clicking "+ Subtask" on a task's details page takes you to the Add Subtask screen (`/todo/addsubtask/...`).

- This screen looks just like the Add Task screen, but it shows the parent task's title.
- Fill in the details for the new subtask.
- Click "Add Subtask" to save and return to the parent task's details page.
- Click "Cancel" to go back without saving.
That's it! You're ready to organize your tasks.